Home | Programs | Vanilla | Walkthrough | 01. Adding an Item
Walkthrough: Adding An Item
When you want to add an new item to your list, you do the following (Based on "Sample
List.van"):
Simply press the "Add" button:

You can also press the 'A' key as well.
A new panel will slide out from the Right Hand Side of Vanilla:
Let's do a sample entry for a fake Movie. First of all, let's enter a name:

Next, we can either type in the "Type" of data, or simply select it from the Pull
Down Menu (as shown):

As you can see from above, that Vanilla already knows what type of "Types" that
you currently have in your list. At this point, we can just select Movie from the
Menu. If you wanted to add a new Type, just type it in, and when you go to enter
the next item, your new "Type" will be automatically selectable.

At this point, there are two possible paths (click on the headers to expand):
If you are just going to type in your description, just type it in the Description
Field:

If your are, for example pasting text from a .NFO file, usually
you find that there are a lot of extra characters in the text. This makes it undesirable
to have it like that in your description. For example, a .NFO file could have the
following description:

To fix this up in Vanilla, simply select the relevant text and paste it into the
Description field:

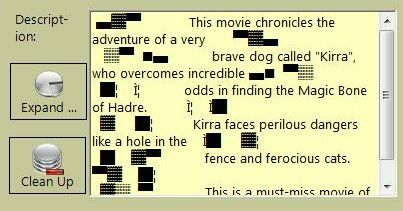
As you can see, the description has a lot of ugly characters in it. To fix this,
just press the "Clean Up" Button:

and, Vanilla then cleans up the text as:

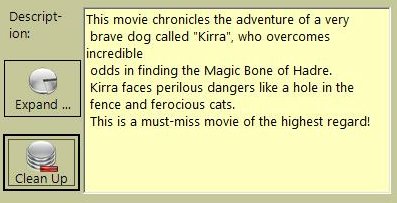
All you need to do is join up the paragraphs, and away you go!
If on the other hand, you have a large amount of text as your description, but you
find that the Description field is too small, there is another solution. Simple
press the "Expand" Button:

This will bring up a new resizable window. This window you can resize to whatever
size you require. The windows will look like:

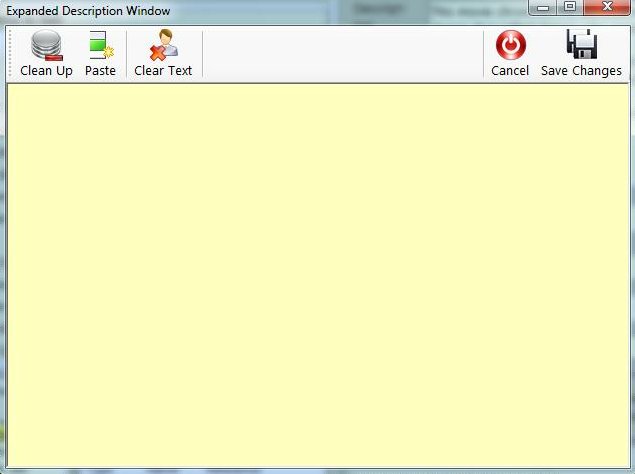
There are a few buttons on top of this window:
Clean Up - Does the same as "Clean Up" in Path #1.
Paste - Pastes the current contents of the Clipboard to the Description.
Clear Text - Clears the Description
Cancel - Closes the Window, but you will loose all changes since this window was
opened
Save Changes - Saves what you've added to the window, and returns you to the Add
Record Screen.
The next field is Genre. You can either select the appropriate Genre, or simply
type in a new one. See the Sample List for a good way to structure your Genres.
(Genres works the same way as "Type"). For this Genre, we'll select "Movie Action":

After Genre, the next field is Size:

You can use size to represent different data, for example, the Number of physical
discs a certain Game encompasses, or you can use Size to specify a file size of
a particular movie (for example, 700). For our example, lets stick with it being
1 Disk in size.
The next element is Format:

As you can see from the Sample List, there is a wide range of Formats. You can select
an existing one, or just type a new format! You can do some interesting things.
For example, continuing from the above example, you can set the Size to 700, and
then Add/Select the Format of "Megs". For our purposes, we'll just assume that our
awesome movie is on one DVD. Select DVD:

Finally, we'll come to our last bit. This is "Reference". You just enter a relevant
code. For example, you may number all your Game in the sequence of GAME001, GAME002,
etc.. or you could something like D2C4R2, which could be decoded as Drawer 2, Column
4, Row 2. Basically enter whatever you need, so you can find the item. You could
even use file paths. But for our example, we'll just use:

Below the reference, there are two buttons:

Press the "Add Record" to add the our item (The Kirra Chronicles), or press the
"Cancel/Finish" button to go back and NOT add the item. .
Your "Add Record" screen look something like once it is completed:

Once we press the "Add Record" Button, "The Kirra Chronicles" will be added to our
list, and the log will reflect this:

The Log will tell you the name of the item you added, with the Reference in Brackets
(makes it easy to keep track of what the next Reference number should be). Once
the "Add Record" button is pressed, the panel will clear, so you can start entering
a new item. If you added an new Types, Formats, or Genres, then the pull down lists
will have any new data added to them.