Adding an Item
There are several ways to add an Item:
- Click the “Add Record” Button (or press A, or CTRL-A on the keyboard).
-The Add New Record panel will appear On this window, you will be able to add a
new item to your list.
Once you start to add a new item, a new panel appears. The first field of the panel
is:

All you need to do is type in the name of the Item. (i.e. 299)
Next you need to define the type of item you are adding. There are two options,
firstly, you can select a Type that you have already entered (via typing in the
first few letters, or clicking on the drop down). If the type is not in the list,
just simply write what type is. The next time you enter a new item, this new type
will be available for you to choose from.
For this example, you can see that there are already 3 predefined Types, but "Movie"
isn't one of them, so type Movie.

Enter "Movie" As it isn't in the List. “Movie” will be in the list
the next time around.
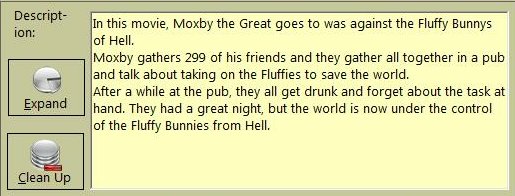
After you entered a Type for your item, you now can add a description. The Description
can be of any Length.
Besides entering the Description, you also have the options of “Expand” (which makes
the Description window larger), plus there also is “Clean Up”, which is really useful
if you are pasting data from external sources (i.e. .NFO files). Clean Up will get
rid of all “rubbish” characters, leaving you with something that is more readable!.
For our Example, we’ll enter a short description of our sample Movie.
<> The next field is the Genre field. What is Genre used for? Genre is a classification
of the Type, for example, Classical Music and Heavy Metal are two Music Genres (categories)
, similarly, Action and Real-Time Strategy are two Genres of Computer Games. This
field works the same as the Type one above, as if the Genre you want is not available,
just type it in, and it will be there the next time.

After Genre, there is Size. This field can signify any integer amount, as it can
be used to keep record of the Number of Disks the item takes up, or the amount of
megabytes the Item uses, or how many them you have. .

After the Size field, there is the Format Option. The Format option works in the
same kind of way as the Genre and Types work, as if the Format you want is not there,
just type it in and it will appear from then on. The Format can be set to anything
you want, for example, from DVD, CD, Blue Ray, Meg, etc. It all depends on what
your item consists of. This can be worked together with the Size field. (for example:
Size: 10 Format: Discs - this mean the item is 10 discs in size or you can use Size:
3589 Format: Megs, which will mean the item is 3589 megs in size, or even you can
do Size: 20 Format: cms, which means the item is 20cms big.

The Last field, is Reference. This can be anything. It lets you input a number/code,
so you know where the item is. for example, some references could be: M334, B3E21S,
Office Shelf 1 or Awesome Mag #43 - Page 32.

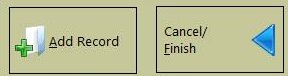
Finally it is time to complete our data entering!. just press the “Add Record” button
to save our new item to the list.
If you are not satisfied with what you are entering, or you have finished entering
all of the items that wanted to, press the “Cancel/Finish” button which will take
you back to the main screen without saving the currently displayed item. (Make sure
that you press "Add Record" on your last item, otherwise you'll loose it.
When you press the “Add Record” button, Vanilla will add your item’s data to the
list. Vanilla will then clear all the fields on the “Add Item” screen, and prompt
you to start entering the next item’s name. If you have added a new category in
any of the Type, Genre and Format fields, Vanilla will add then to the appropriate
field, so you can choose them for your next item.
Under the “Add Record” and “Cancel/Finish” buttons, there is a log. The advantage
of this is, that it will let you know what was the last item that you entered. For
example, from entering the above data, and after pressing the ‘Add Record” button,
the log will show this:
